|
3/15/2021 0 Comments Spyglass Activityby SWARA REPALA and Sanjana Kambhammettu
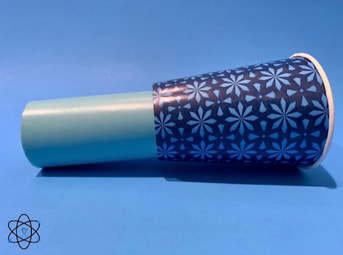
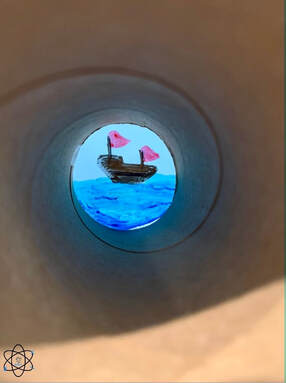
In this session, we will be exploring the concept of the ocean's waves, through the creation of a spyglass, and by playing a kahoot! We will be discussing the different types of waves and how they are formed. When you look through this spyglass, you will see a beautiful boat scene with waves! Our recommended age group for this project is 4-10 years old, however, all ages are welcome!
MATERIALS NEEDED:
- 1 paper cup or plastic cup
- 1 cardboard paper roll - glue/tape - permanent markers (washable markers can be used if needed) - Optional: decorative materials HOW TO
Step 1 : Trace around your paper tube on the bottom side of your cup.
Step 2 : Cut out circle, and make sure your toilet paper tube fits snuggly into the cup. Step 3 : Trace a circle that is the same size the toilet paper roll cycle on a piece of plastic film, from a ziplock bag, sheet protector, plastic wrap, etc. Step 4 : Using permanent markers, draw a boat scene with ocean waves onto the plastic wrap. Step 5 : Cut this circle out, and tape it to the toilet paper roll. Optional step: decorate the roll anyway that you would like! Step 6 : Insert the tube through the cup, and look through your spyglass! THE LESSON
In this session, we will be discussing ocean waves. We will cover the three types of waves: wind-driven waves, tidal waves, tsunamis, and how they are formed, as well as their characteristics. We will also have some friendly competition and play a Kahoot! This connection and hands-on learning will push children to use their creativity, and develop their critical thinking skills. This will help them retain the knowledge learned and apply it in real-world situations. You can find the science lesson and a picture of the craft below!
0 Comments
3/2/2021 0 Comments Renewable Energy: WindMillSanjana Kambhammettu and Vishista Chittalooru
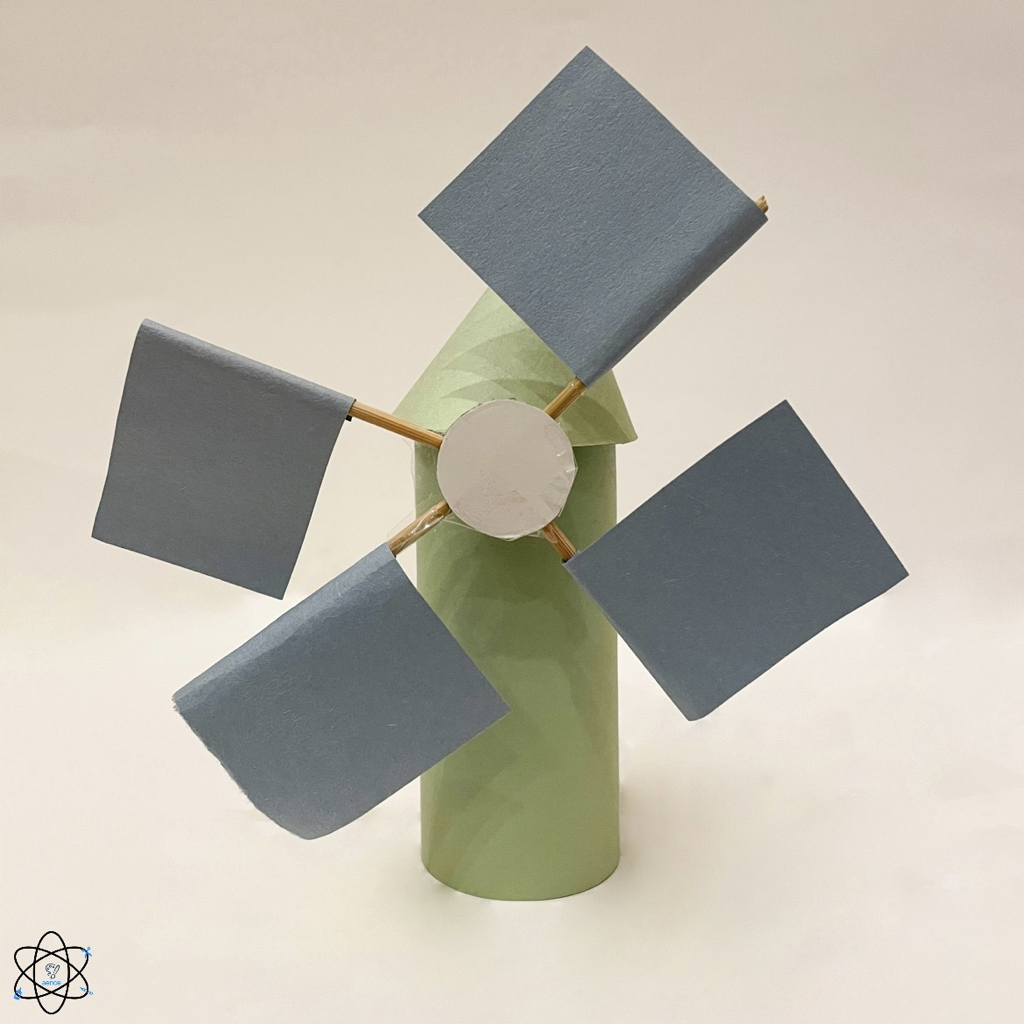
In this session, we will be exploring the concept of energy, more specifically renewable v.s. non-renewable energy sources, and how they impact our planet. While discussing these topics, we will be creating a 3-D windmill model to demonstrate one method of renewable energy: wind power. Our recommended age group for this project is 7-10 years old, however, all ages are welcome!
Materials Needed:
- Toilet Paper Roll
- Scissors - Tape - Cardboard/Sturdy item (ex. small portion of a paper plate) - Wooden skewer(s), 4 toothpicks, or 2 straws - I sheet of paper Optional: 1-2 sheets of construction paper, writing/coloring utensil(s) How To
Step 1: Cut out a cardboard circle the size of a quarter.
Step 2: Create four equal sections on this circle. Step 3: Cut one straw or wooden skewer into 4 equal sections (make them a size that works with the size of your toilet paper roll) Step 4: Cut out 4 small squares/rectangles, adjusting the size according to the length of your straw pieces. Step 5: Attach each square/rectangle to the end of your straw pieces. They should look something like mini flags! Step 6: Place each "flag" flat on the cardboard circle in an X shape. Attach it to the cardboard using tape. Step 7: Put your about 1/2 inch from the top of the toilet paper roll, and trace the circular ending of the straw onto the roll. Step 8: Cut out that circle, making sure you do it on the other side! Your straw needs to go through the toilet paper roll! Step 9: Using tape, attach the straw directly to the center of the circular cardboard that has our flags on it. Retape it as many times as needed, it needs to be sturdy! Step 10: Pull the straw through the holes in the toilet paper roll. Optional step: Decorate the outside of your paper towel roll using a sheet of paper and/or coloring utensils. Step 11: Make a small cone that covers the top of the paper towel roll by cutting a 4 in x 4 in paper and glueing/taping it closed. Step 12: Spin the windmill with your finger, and watch it create renewable wind energy! The Lesson
In this session, we will be adressing the differences between renewable and. non-renewable energy sources, and how we use them in our world today. This includes learning about how fossil fuels impact Earth, and how different forms of energy, such as solar, wind, hydro, and thermal are beneficial to our planet. This connection between the previously mentioned concepts and the real life application behind the crreation of the wind mill will allow for students to deepen their critical thinking skills and for them to make more in depth realizations. You can find the science explanations and a picture of the craft below!
2/24/2021 0 Comments Solar system activityvishista chittalooru and swara repala
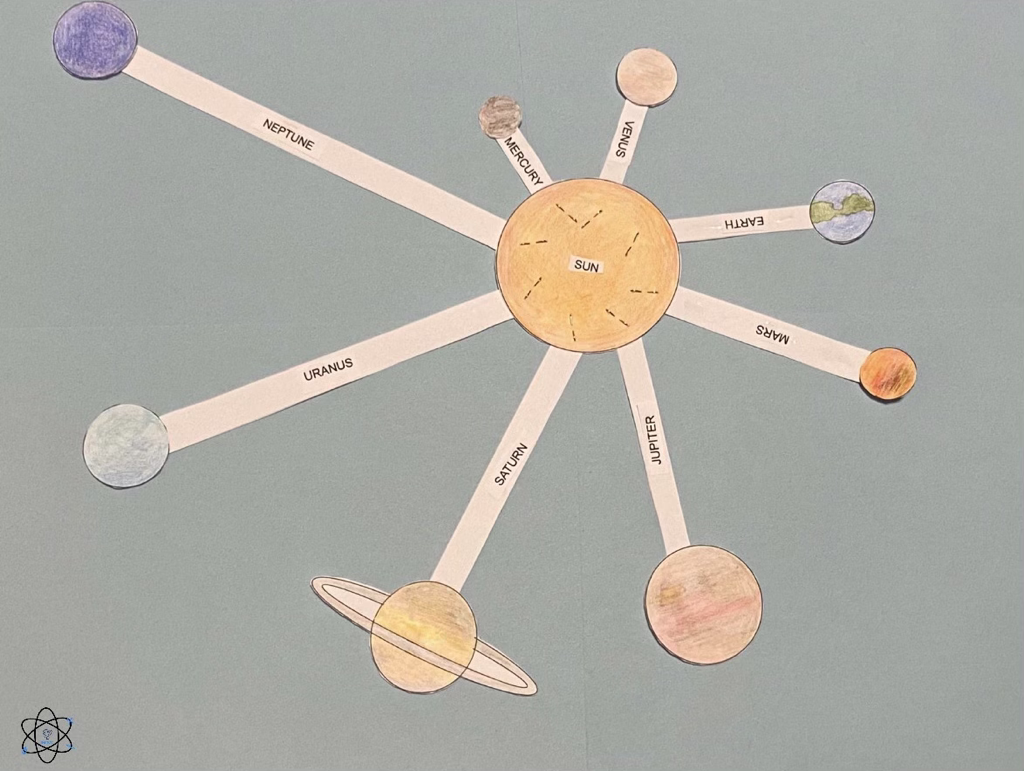
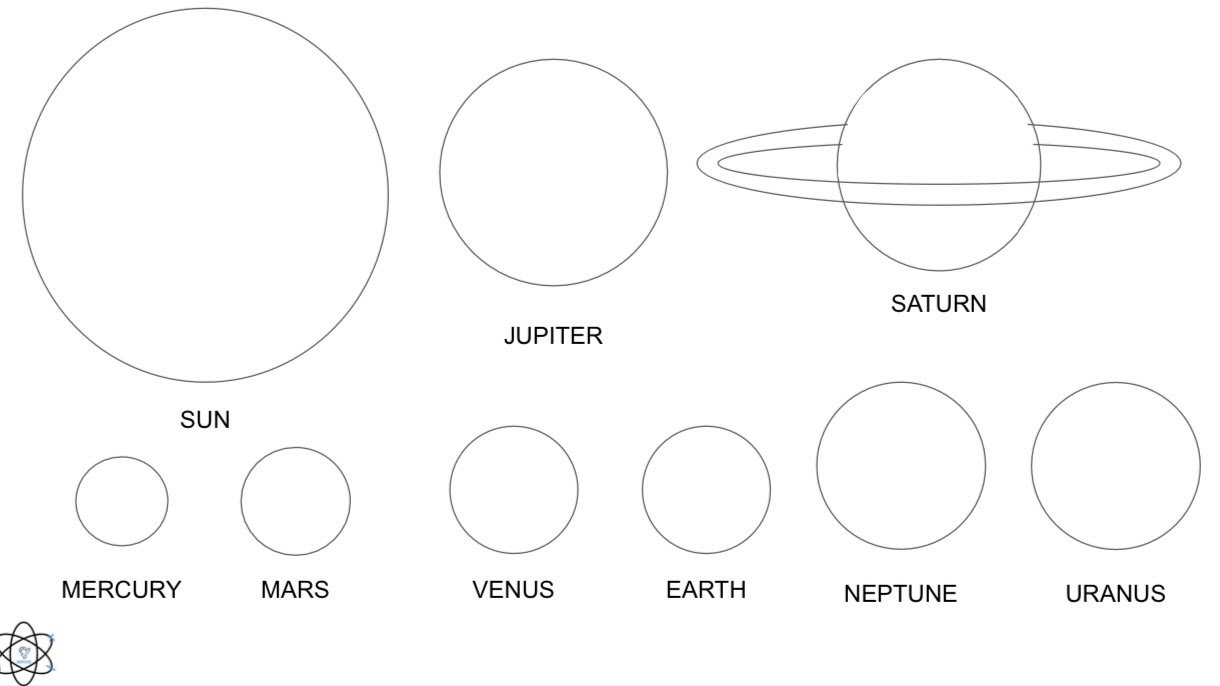
In this session, we will to creating an interactive model of the solar system, which can be spun or moved to show the path and position of planets. Alongside this, we will be learning about the solar system, specifically what the solar system ecompasses. In particular, we will be going into detail about each of the planets in the solar system, learning about their atmosphere, what they're named after, and more! Our recommended age group for this project is 4 to 10 years old, although all ages are welcome!
materials needed:
- 2 sheets of paper
- Stapler - Glue/Tape - Scissors - Pencil Optional: Coloring materials How to
Step 1: Draw the Sun and 8 planets on your sheet of paper, making sure to account for the size differences or print out the template below.
Step 2: Cut out the Sun and planets. Step 3: On another sheet of paper, divide it into 8 equal rectangular strips (they should look like stripes). Step 4: Cut out the sections. Now you should have 8 strips of paper. Step 5: Attach each planet to the end of a stip of paper using glue or tape. Step 6: Now, arrange the planets in order: Mercury, Venus, Earth, Mars, Jupiter, Saturn, Uranus, and Neptune. Step 7: Trim the strips of paper in increasing order. So the strip of paper Mercury is on should be the shortest, and the strip that Neptune is on should be the longest (so don't cut Neptunes strip!). Step 8: Attach each strip of paper in order to the center of your Sun individually using a stapler. Make sure that it is able to spin! Step 9: Color and label your planets and Sun. Step 10: Spin around the planets and watch their positions move! the lesson
In this lesson, we will be exploring outer space, learning about the structure of our solar system and what it is made up of. We will go into detail about the planets, understanding their place and position is the solar system, their different characteristics, and more. We will also we learning about the overarching classifications of planets- what separates "gas giants" and terrestrial planets, what they actually are, and what planets fall under these categories. Additionally, we will examine the asteroid belt and understand what it is, what asteroids are, and how many of them exist within the belt. To deepen the kids understanding of the subject we will be creating a moveable diagram of the solar system. This model can be manipulated to show the positions and paths of each planet, helping the understanding of the solar system. You can find our detailed science lesson and craft explanations in the presentation below!
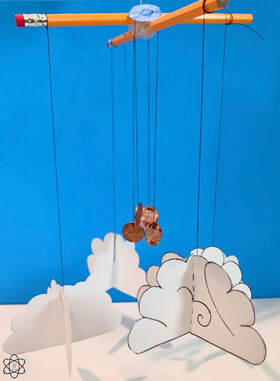
2/16/2021 0 Comments Cloud ChimesBY Swara Repala and sanjana Kambhammettu
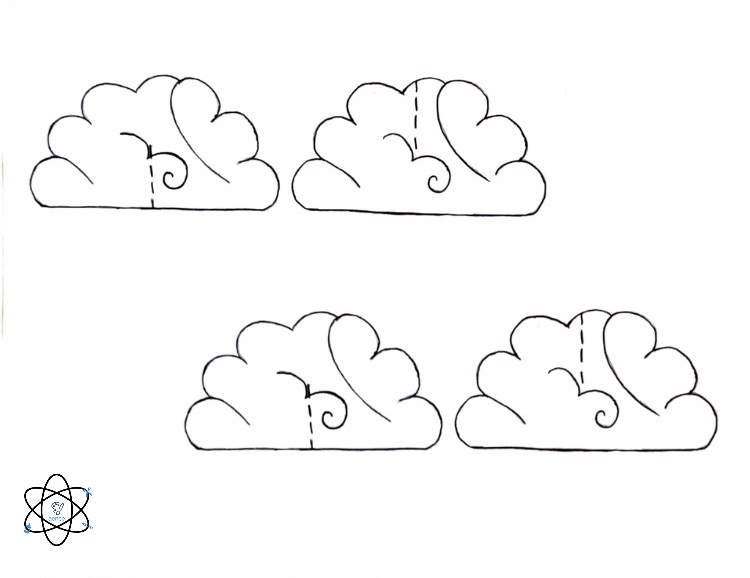
In this session, we will be making a moving model of clouds, which is in the form of a wind chime. We will be discussing the different types of clouds. More specifically, we will learn about how to identify them, which type of weather they bring, and where they are located in the sky. Our recommended age group for this project is 4 to 10 years old, although all ages are welcome!
materials Needed:
- 2 pieces of paper
- 2 pencils - 3 feet of string - 4 coins - Tape - Scissors HOW TO
Step 1: Place your two pencils on a flat surface, in the form of an X, and place tape in the center to secure them together.
Step 2: Draw and cut out 8 clouds that are around the same size, or print out 2 copies of our free downloadable template, which can be found below. Step 3: Make 2 piles, 4 clouds in each. For the first section, cut a slit from the top to the middle of the cloud. For the other 4, cut a slit from the bottom to the middle of the cloud. Step 4: Fasten these together with their corresponding slits. You now have 4 3-D clouds! Step 5: Tape string to the top of the clouds, and tie/tape the other end of string to the end of each of the pencils. Step 6: Tape string to each of the 4 coins. Step 7: Tie/tape the strings with the coins to the center of the pencils. Step 8: Watch your clouds move as the coins chime together to show weather movement! THE LESSON
This makeshift wind chime shows the movement of clouds and depicts cumulous clouds. When the model is finished, it serves as a wind chime which makes the sound of coins as they move. The creation of this model will push the children to make connections between their hands-on activity and their surroundings, such as identifying the different types of clouds that they see in the sky. Their creativity combined with the real-world connection will allow for a deeper understanding of the concepts and ideas. You can find our detailed science lesson and craft explanations in the presentation below!
Early spring or more winter? Chocolate hearts or flowers? February brings many choices, some that humans have to make and some that groundhogs have to make. This year Punxsutawney Phil has declared that there will be 6 more weeks of winter, though I may doubt his call a little… I’m just saying, it’s been warming up recently. Other than Groundhog Day, February has another major holiday to look forward to. No, it’s not the National Flag of Canada Day. You guessed it! It’s Valentine’s Day. On February 14, restaurants are packed, flowers are sold out, and chocolates are incredibly overpriced. We also see hearts everywhere. Red hearts, pink hearts, white hearts. Hearts, hearts, hearts! Honestly, the Queen of Hearts would be jealous. And though we’re bombarded with anatomically incorrect shaped hearts all February, does anyone actually stop to think about your heart? How it functions, and what it does for us? I predict that most people haven’t, but look no further! Here is a simple overview of our heart:
The heart is an organ located approximately in the middle of your chest and is roughly the size of a large human fist. It’s part of the circulatory system, which is responsible for circulating oxygen and nutrients to cells throughout the body, and is made up of the atria, ventricles, valves, and various arteries and veins. The heart circulates blood through two pathways, the pulmonary and systemic circuits. In the pulmonary circuit, deoxygenated blood leaves the right ventricle through an artery and then returns as oxygenated blood to the left atrium through veins. In the systemic circuit, oxygenated blood leaves the heart through the left ventricle and travels to the aorta. From there, it enters the arteries and capillaries and is distributed to the entire body! But don’t forget, the heart is a muscle as well and requires oxygen. So blood then renters the heart through veins, completing the cycle! As you can see, the heart is essential to life functions, so it’s important to keep it healthy. Regular exercise, eating healthy, and managing stress is vital to your well being, along with avoiding harmful substances like smoking. A way to fit in exercise in our busy lives is to wake up a little bit earlier to go on a walk or run. Spend time outside, and use it as an opportunity to recharge. I’ve found that if I don’t make a conscious effort to spend time outdoors at least once a day, it will be weeks before I randomly get the urge to go biking or to run! So make it a habit, incorporating it into your daily morning or evening routine. Doing this not only ensures that your heart stays healthy but the rest of your body as well. You can never go wrong with fresh air! So, use Valentine’s Day as a celebration not only of love but of health! Make sure to take care of yourself, whether that be exercising, relaxing, or anything else you see fit! Fun Fact: Americans spent over $20 billion on Valentine's Day gifts in 2019, including 2.4 billion on candy alone! 2/9/2021 0 Comments Leprechaun Marionette PuppetBy Vishista chittalooru and swara repala
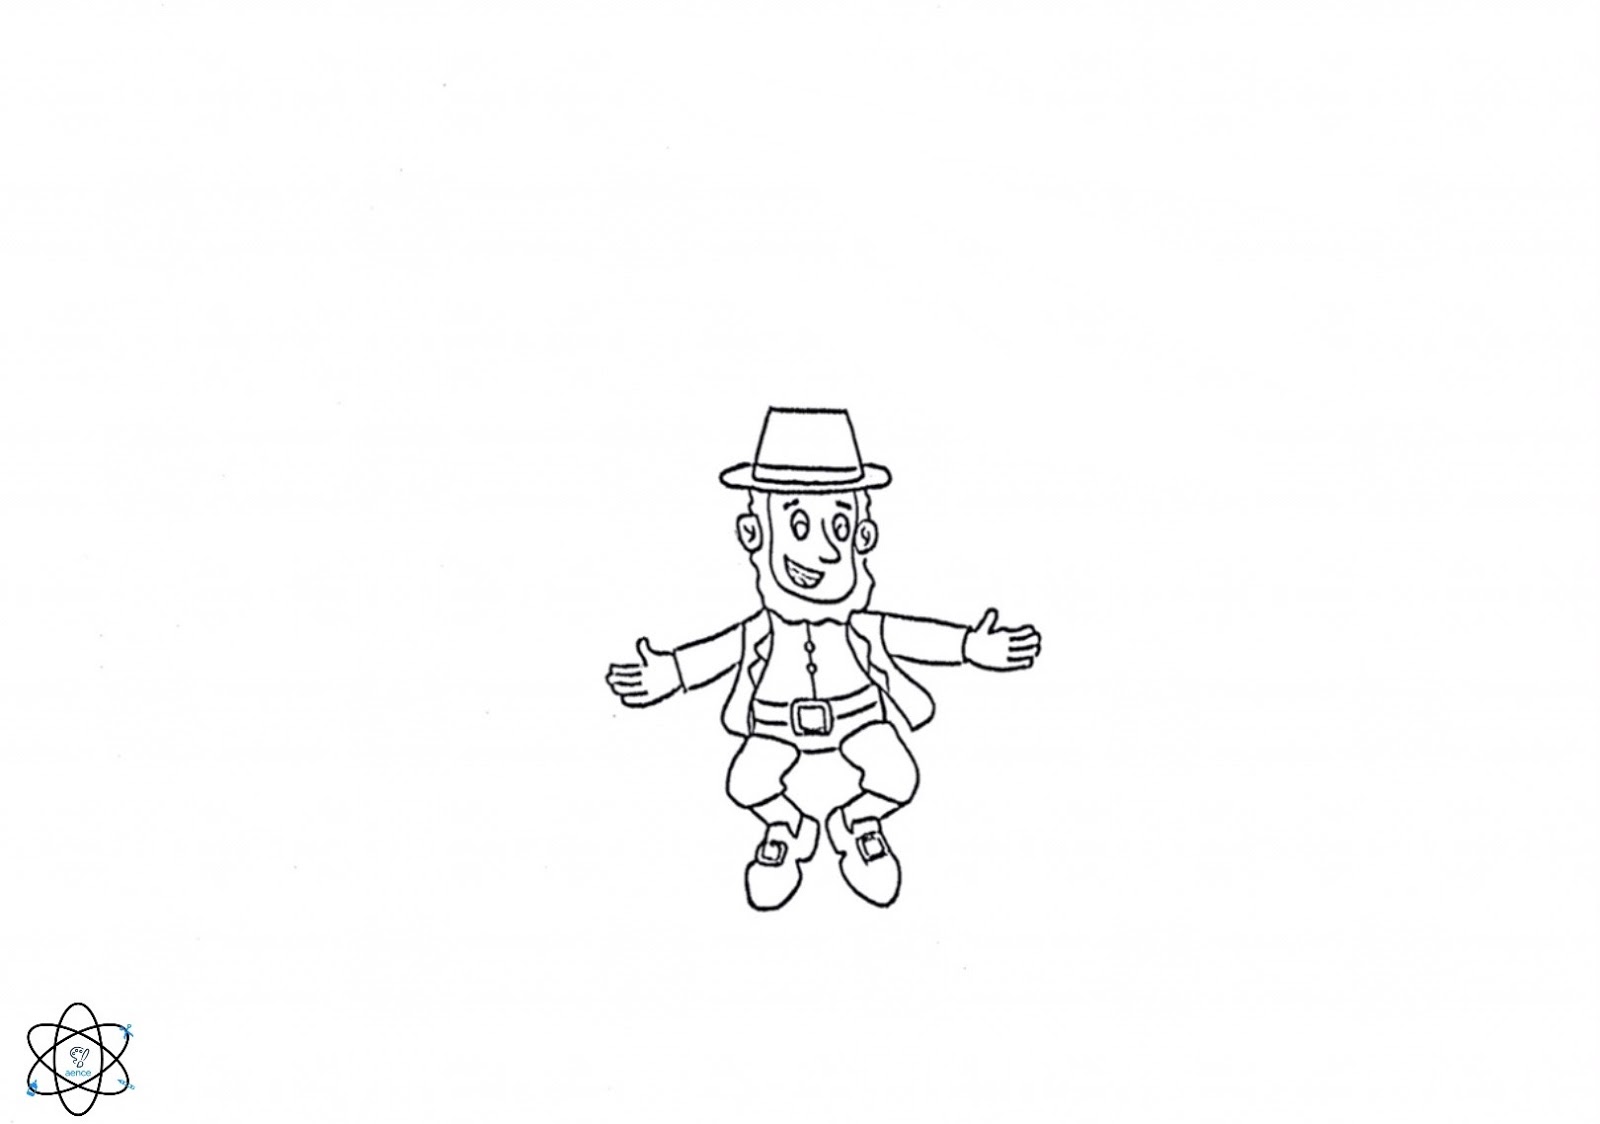
In this session, we will be learning about rainbows and the Irish holiday of St. Patricks Day, through the creation of a leprechaun marionette puppet! We will be exploring the background and origins of St. Patricks Day, rainbows, how they're formed, and more! Our recommended age group for this project is 4 to 10 years old, although all ages are welcome!
materials needed:
- Paper
- Pencil - Popsicle sticks (or pencils) - Thread/ thin string - Scissors - Paper clip Optional: Coloring materials how to:
Step 1. Draw a leprechaun on your paper.
Step 2. Cut out the leprechaun. Step 3. Cut the legs off the leprechaun Step 4. Make two small holes in the legs of the leprechaun. Step 5. Thread a paper clip through the legs of the leprechaun and attach it to the body of the leprechaun. Step 6. Make another small hole in both of your leprechauns legs. Step 7. Thread some string through the holes. Step 8. Tie each ends of the string to separate popsicle sticks. Step 9. On the leprechauns head, tape the thread onto it and then tie it to a popsicle stick. This will not move, but it provides support. Step 10. Move your leprechaun around using the popsicle sticks, and watch it walk! the lesson
In this lesson we will be learning about the Irish holiday of St. Patricks Day, and specifically it's association with rainbows. After reviewing its history and origin we will go into depth about rainbows, describing how they form in nature. In addition, we will also be covering light, how it moves, and the color spectrum! By the end of the session, through the hands on creation of the craft, your child will understand the concepts behind rainbows and how they occur. You can find our detailed science lesson and craft explanations in the presentation below!
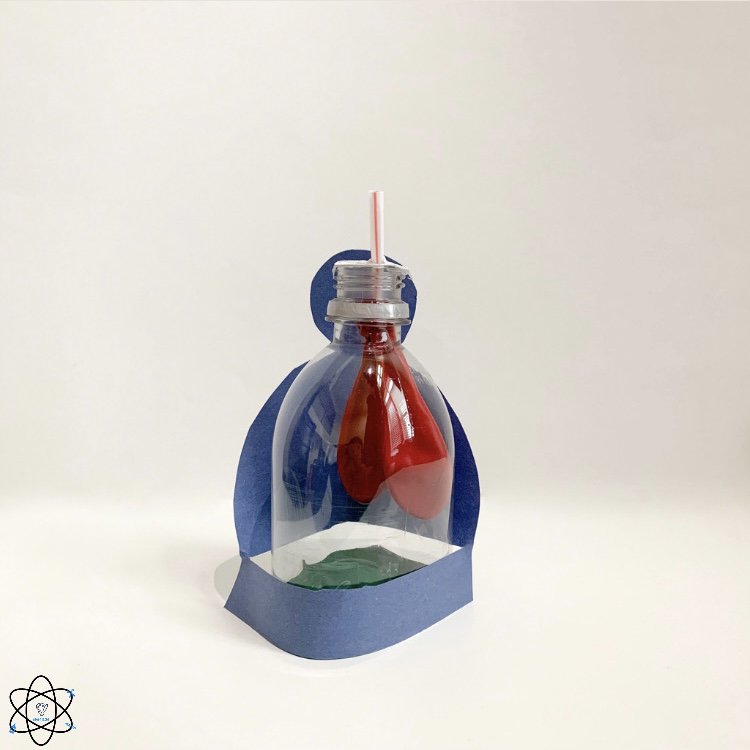
2/2/2021 0 Comments Respiratory System ActivityBy Sanjana Kambhammettu and Vishista Chittalooru
In this session, we will be discussing the respiratory system while creating a 3-D model of the body system. We will be discussing topics within this broad one, in specific to how breathing, or respiration, occurs. This includes the important role that the diaphragm muscle plays in respiration, the specific structures that the respiratory system consists of, and more! Our recommended age group for this project is 4 to 10 years old, although all ages are welcome!
Materials Needed:
- Plastic Water Bottle
- 3 balloons - One straw - Tape - Scissors or an Exacto knife(with recommended parental supervision) - Optional: Paper, Coloring Materials. How To
Step 1: Cut the bottom of your plastic bottle off(you can also cut it in half).
Step 2: Discard the bottle cap. Step 3: Cut your straw in half and inset them through the top end of your bottle. Step 4: Tape the ends of the straws that are located inside the bottle to two balloons, which willl act as your lungs. Step 5: Cut the top off the 3rd balloon. Step 6: Close the large end of the bottle by stretching the 3rd balloon over the opening. Optional Step: Decorate your diagram if you would like. An idea is to create a paper cut-out of a human body around the bottle, like we have done(shown in the picture below)! Step 7: Push your diaphragm in and out to see your lungs inflate and deflate, demonstrating breathing! The Lesson
This interactive model shows how the lungs and the respiratory system works, as pushing the balloon in and out of this craft inflates and deflates it with air, similar to how we breath! With the creation of their own 3-D diagram, the children will be able to make connections between their hands-on activity and their own body systems in the works. Their creativity combined with the body resemblance of the craft will allow for better understanding of the concepts at hand and the information discussed will be more profoundly retained!
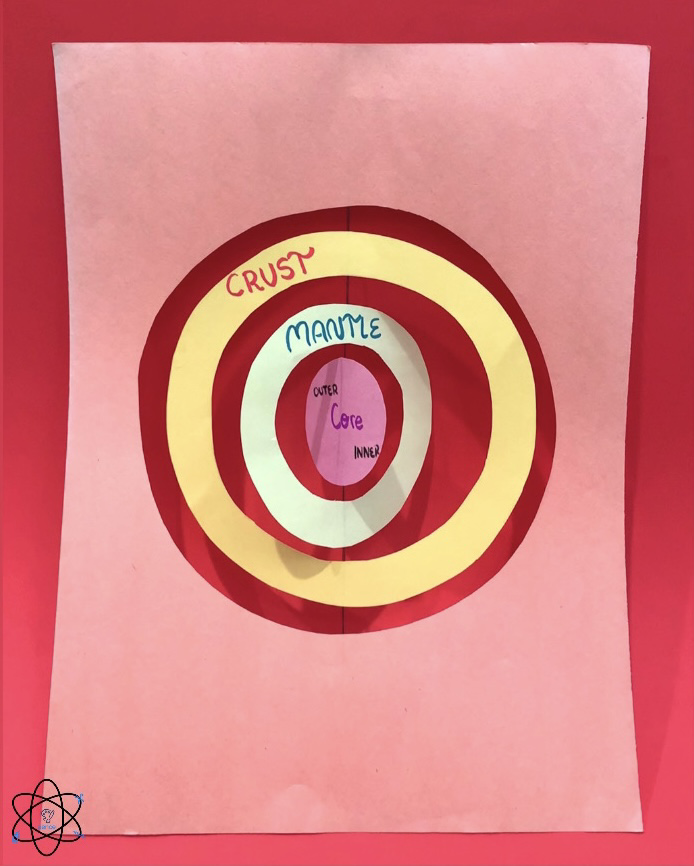
1/26/2021 0 Comments Layers of the EarthBy Swara Repala and Sanjana Kambhamettu
In this session, we will be making a craft that displays the layers of the earth. We will be discussing each layer of the Earth, and going into depth about the differences between each and their special characteristics. We will be focusing on the crust, mantle, and the inner and outer core, as well as the continental and oceanic crust, lithosphere, and asthenosphere. The recommended age group for this project is 4 to 10 years old, although all ages are welcome!
Materials Needed:
- 1 sheet of paper (can have more for color variety)
- String/yarn/ribbon - Tape or glue - Scissors - Optional: Writing Utensils HOW TO
Step 1: Take a piece of paper, and cut a large circle in the middle of it, going from end to end. You can use a circular object to assist you.
Step 2: Take the circle you cut from the paper, and use that to cut out a large ring. Cut two more rings from that same paper so that they fit inside each other. You need to have 3(optionally 4) rings total. Step 3: Tape a sting down the middle of the paper, and tape the rings onto it, in size order. Step 4: Label the rings with the names of the layers. Step 5: Hold up you paper, and watch the layers spin! The Lesson
Throughout the course of this session, we will be discussing the layers of the earth. We will be exploring characteristics such as what each layer is made up of, the size, and more. This is an interactive activity depicting the layers of the earth, and encourages hands on-learning. It therefore ensures a deeper understanding, and helps foster interest of the topic in children. You can find our science lesson and craft explanations in the presentation below!
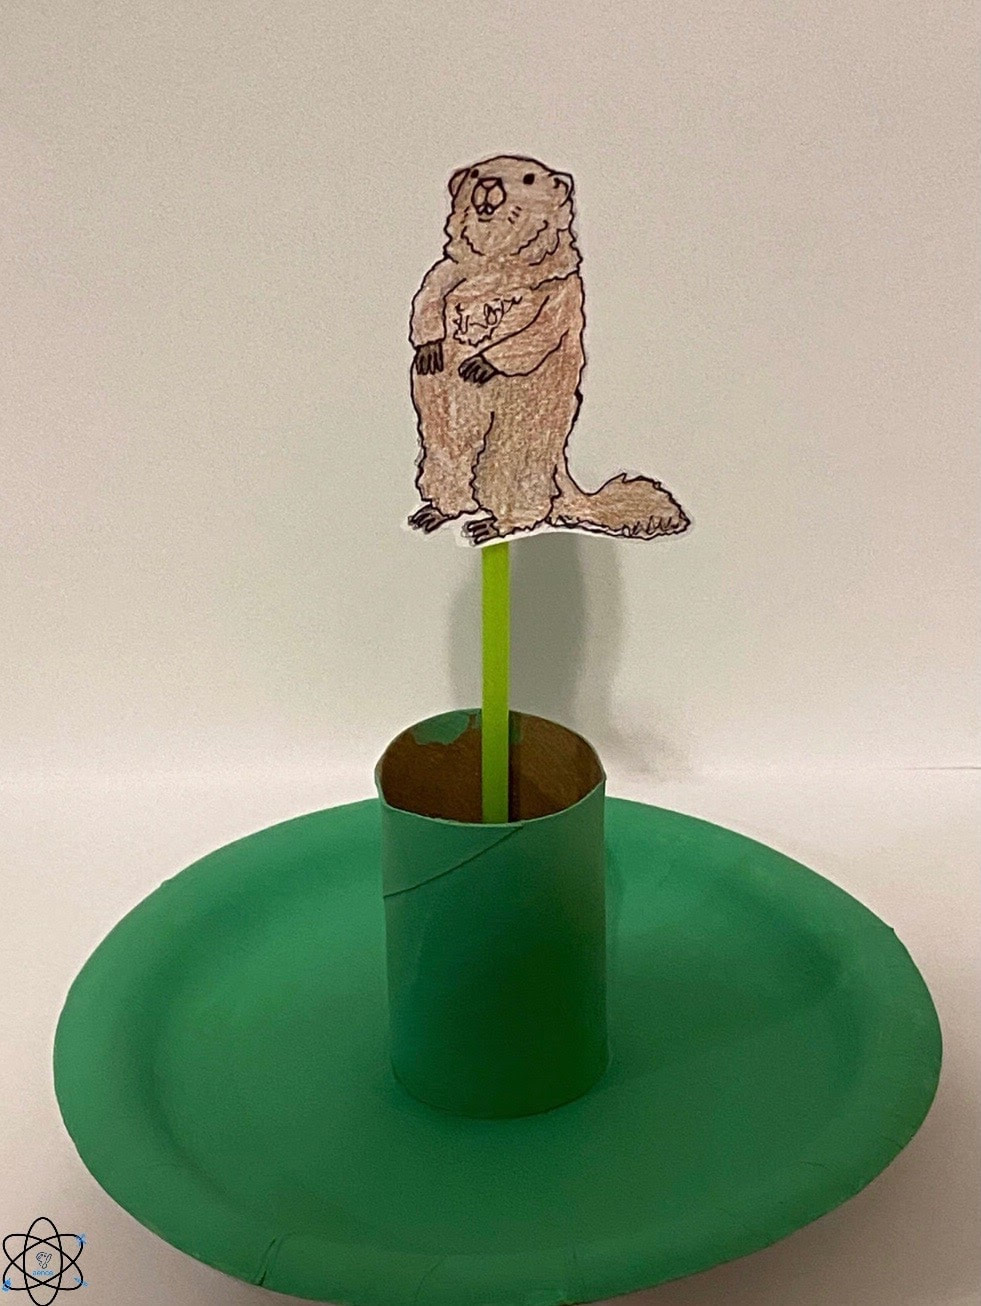
1/18/2021 0 Comments Groundhog Day Activityby vishista chittalooru and swara repala
In this session, we will be creating a stimulating craft, modeling the essence of Groundhog Day, exploring the concepts of shadows and their relation to the prediction of seasonal changes - in this case the arrival of Spring! We will also be learning about why seasons occur, and how we can generally predict the arrival of seasons. The recommended age group for this project is 4 to 10 years old, although all ages are welcome!
Materials needed:
- Paper plate
- Toilet paper roll or some type of roll of cardboard (must be around the size of a toilet paper roll) - Sheet of paper OR you can print out our template below! - Straw - Tape and/or glue - Scissors - Pencil Optional: Coloring materials (we find that paint is the best way to color your plate if you so choose!) AND our template down below! how to
Step 1: Draw a small groundhog on you paper. Make it however you choose, but it should fit in your toilet paper or cardboard roll!
Optional: OR you can print out our groundhog template below! Optional Step 2: Color your groundhog. Step 3: Cut out your groundhog. Step 4: Tape you groundhog to the top of your straw. Optional Step 5: Decorate your plate (we find that paint is the best way to color your plate if you so choose!) Step 6: Cut a small X in the center of your plate. Optional Step 7: Color/decorate your toilet paper/cardboard roll Step 8: Glue your toilet paper or cardboard roll in the center of your plate. The X we cut should be in the center of the toilet paper/cardboard roll. Step 9: Place your straw through the toilet paper roll until you cannot see the groundhog anymore. Step 10: Push the groundhog up near light and you can see its shadow! Push it away from light and you cannot see its shadow! the lesson
In this lesson we will be learning about the North American celebration of Groundhog Day, and its significance in predicting the changing and arrival of seasons. We will be understanding the science behind the holiday, and why Punxsutawney Phil (and other groundhogs) does or does not see his shadow, affecting his prediction of the early of late arrival of spring. In addition we will be learning about the actual cause for the seasons, going into detail about various phenomena such as the Earth's tilt, revolutions and their influence over the seasons, and solstices and equinoxes. By the end of the lesson through the hands on creation of the craft, your child will understand the concepts behind the changes of seasons. You can find our detailed science lesson and craft explanations in the presentation below!
1/11/2021 0 Comments Zones of the OceanBy Sanjana Kambhammmettu and Vishista Chittalooru
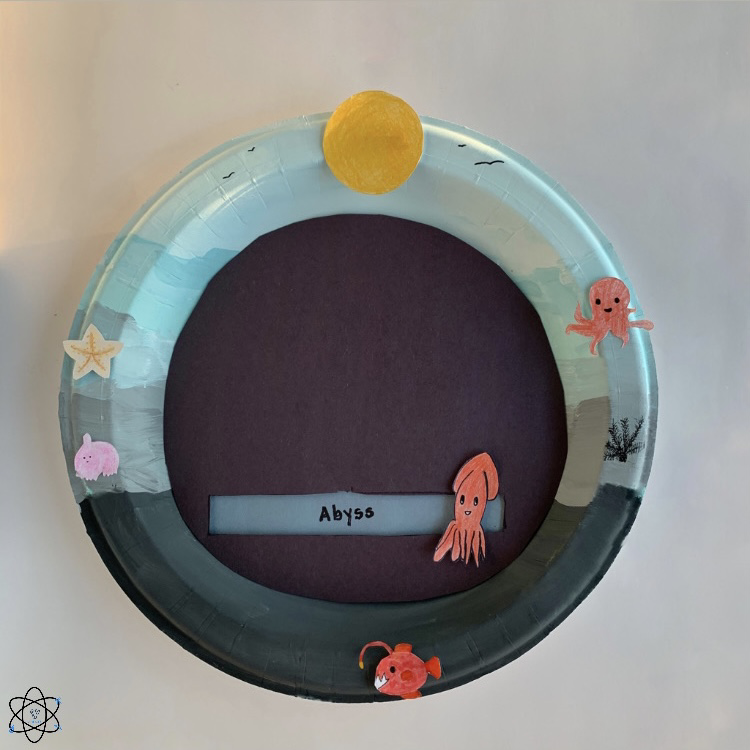
In this session, we will be creating a craft that shows the zones of the ocean! This activity focuses on the differences in each of the 5 zones, and shows that through the sliding craft. In addition to this, we will be discussing topics such as the 5 oceans that make up most of the planet, and marine life. The recommended age group for this project is 4 to 10 years old, although all ages are welcome!
Materials Needed:
- Paper plate
- Pencil/pen/popsicle stick - Sheet of paper - Scissors - Glue/tape - Optional: Decorative materials How to
Step 1: Cut a slit on the right side of the inside of the plate, about 3 inches long.
Step 2: Draw 5 sections on the plate, going down in a row, and increasing in depth as it goes lower. This will show all the zones of the oceans, which is outlined in more detail in the presentation below. Optional Step: Decorate your background however you would like. Step 3: Cut a rectangular strip of paper that will cover all the zones except one. Step 4: Slide your pencil/popsicle stick into the slit from behind. This will be your slider. Step 5: Glue or tape the right middle of your strip of paper to one end of the slider. Step 6: Slide up and down to see the zones of the ocean! The lesson
Throughout this session, we will be explaining aquatic ecosystems. We will be exploring concepts related to the great mystery of the underworld by learning more about aquitic life, and the depths of the 5 oceans. This hands-on activity that demonstrates the 5 zones, and ensures that the children will be innovative and deepen their knowledge on this. You can find our science lesson and craft explanations in the presentation below!
|
|||||||||||||||||||||||||||

