|
5/25/2021 0 Comments Oobleck ActivityBy Swara Repala
The next topic that we will be covering in our Summer Camp is matter! We will discuss the states of matter and their characteristics, as well as how they can go through physical changes such as sublimation, condensation, evaporation, freezing, boiling, and melting. We will be creating a slime-like substance, which is in a liquid state but becomes solid when touched.
MATERIALS NEEDED:
- 1 bowl
- 1 spoon - 1/2 cup of cornstarch - 1/4 cup water HOW TO
Step 1: In a bowl, add 1/2 cup of cornstarch.
Step 2: Slowly start mixing the water into the cornstarch. Add a little bit at a time to make sure it does not become too runny. Step 3: Now take the oobleck into your hands and feel it solidify, and change between the states of matter. THE LESSON
In this lesson of our Summer Camp, we will be learning about the different states of matter and their characteristics. We will go into depth of how they can go through physical changes such as sublimation, condensation, evaporation, freezing, boiling, and melting. We will be creating oobleck which is a slime-like substance, which is in a liquid state but becomes solid when touched. This practical application of seeing the states of matter change helps children combine creativity with their thinking skills. You can find our science concepts and craft explanations in the presentation below!
0 Comments
5/25/2021 0 Comments Brain Model Activity
By Sanjana Kambhammettu
In this section, we will be forming playdough from scratch in order to make a 3-D human brain model. We will be discussing the different parts of the brain and their functions throughout the session, and associating them with the area of the mind depicted in our hand-held creations.
Materials Needed:
- Flour
- Water - 1 bowl - 1 cup - 1 spoon/mixing utensil - Salt - Oil - Food coloring/paint/any natural dyes Note: The ingredients above are for the creation of no-cook playdough. If you would like to use store bought clay instead, you will not need the given supplies. - Optional: Air tight container or ziplock bag for storage afterwards. Clay molding tools (your hands work perfectly for this, too!) How To
To create the playdough:
Step 1: Add the flour and salt in the bowl, and mix together. Step 2: Mix together the oil and food coloring in a cup. Step 3: Add hot water to the cup, and mix until the food coloring is completely dissolved (the darker your mixture, the more vibrant your dough will be). Step 4: Pour the liquid mixture into the dry mixture, and stir until it reaches a dough consistency. Step 5: Making sure your dough has cooled, lay it out on a floured surface and knead until it is no longer sticky. To create the brain model: Step 1: Following the structure of a human brain, break apart your clay and mold into the parts. If you would like, create a different colored dough for each section of the brain. Step 2: Piece these together, and smooth them out. Step 3: Add any details, such as meninges, with the use of your hands and molding tools. Step 4: Enjoy your very own concocted 3-D brain model! The Lesson
In this science lesson, we will be using our own three-dimensional diagrams of a human brain to understand how specific parts of the brain relate to each role that it has, and how that section carries out its part through the use of different body systems. We will also discuss how your brain perceives the information that it receives through your senses, and how it directs that for different situations. For example, if you place your hand near a hot stove, your brain and nerves work together to send signals that result in you identifying the heat and pulling your arm away, all in a matter of seconds!
5/11/2021 0 Comments Pan Flute ActivitySanjana Kambhammettu and Vishista Chittalooru
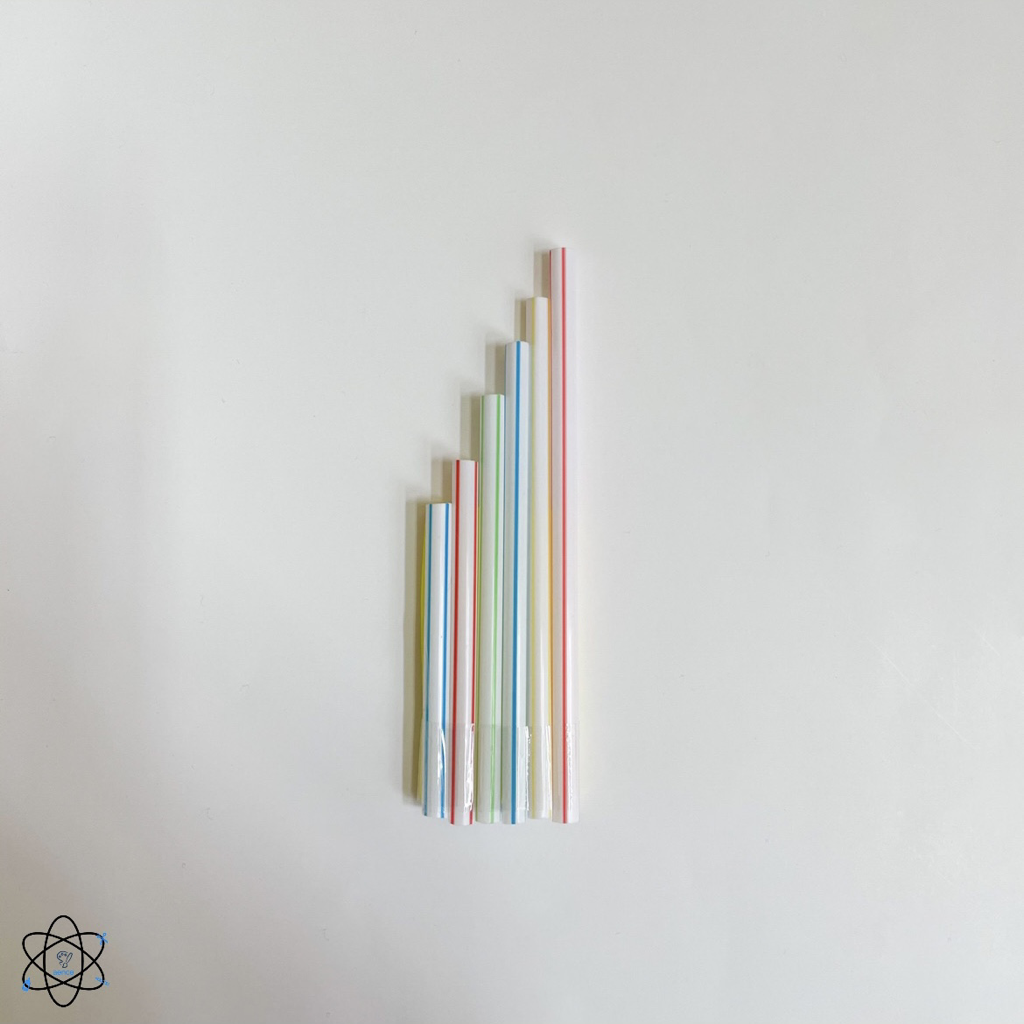
In this lesson, we will be learning about sound frequencies and waves, and how differences in the length of the straws used in this lesson will affect pitch. This flute can be "played" and is fully functioning in the way that blowing in different combinations of straws produces different sounds. All ages are welcome!
Materials Needed:
- 4-6 Straws
- Tape - Scissors - Optional Materials: Ruler How to
Step 1: Lay all your straws down on a flat surface, aligning them.
Step 2: Leave the first straw alone, and cut 1/2 inch off the top of the second straw. Step 3: Cut an additional 1/2 inch after each straw (example: 3rd straw-cut 1 inch off, 4th straw- cut off 1.5 inches). Once finished with all the pieces, they will look like stairs or stepping stones diagonally, from longest to shortest, using your ruler to make sure they are aligned. Step 4: Tape the straws together securely, using several pieces if necessary. Step 5: Blow into your flute from the flat side, and listen for which sounds have the highest and lowest pitches! The Lesson
In this lesson, we will be learning about the basics topics of frequency, vibrations, and waves. This practical application of how terms like pitch applies to their own musical instrument ensures the retention of information that have been discussed, and pushes children to combine creativity with their critical thinking. You can find our science concepts and craft explanations in the presentation below!
BY SWARA REPALA AND SANJANA KAMBHAMMETTu
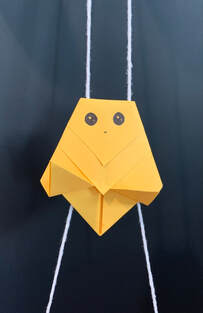
In this session, we will be learning how to make a climbing bird interactive activity, to learn about how animals adapt to their environment, as well as migration. This bird will 'fly', and climb up the threads. The recommended age group for this project is 4-10 years old, although all ages are welcome!
MATERIALS NEEDED:
- Paper
- 2 feet of string or yarn - Tape/glue - Scissiors - Optional: Coloring/decorative materials HOW TO
Step 1: Starting out with a rectangular sheet of paper, fold it diagonally into a triangle.
Step 2: Open it up, and fold the other side diagonally as well. Step 3: Having the flat side on the bottom, fold the two sides of the triangle up to the top corner, creating a diamond. Step 4: Pull the corners of the diamond back, and crease it about halfway. Step 5: With the two layers of paper that are left on top, fold them down as well, leaving about an inch in between the two. Step 6: Flip your bird over. Set this to the side, and fold your string in half, with a loop at the top. Step 7: On the bird, bring the edges together, and slide the string through. Use glue/tape to secure. Step 8: Attach the loop of your strings somewhere up high, and watch the bird fly when you pull at the bottoms! THE LESSON
In this lesson, we will be learning about migration and other adaptations patterns. We will be looking at the 3 types of adaptations that are observed in animals and why they happen, along with the reasons behind migration happening. This hands on activity of creating the climbing bird ensures that the children will retain all of the content they have learned. It further deepens their creativity and critical thinking skills, which pushes them to make more real world connections. Find our science lesson and craft explanations in the presentation below!
|
|||||||||